Mixing two colors

Just a quick tips for those of you needing to blend two colors. Usage is very easy.

// Usage  NewColor:= Blend(Color1, Color2, blending level 0 to 100);
function Blend(Color1, Color2: TColor; A: Byte): TColor;
var
  c1, c2: LongInt;
  r, g, b, v1, v2: byte;
begin
  A:= Round(2.55 * A);
  c1 := ColorToRGB(Color1);
  c2 := ColorToRGB(Color2);
  v1:= Byte(c1);
  v2:= Byte(c2);
  r:= A * (v1 - v2) shr 8 + v2;
  v1:= Byte(c1 shr 8);
  v2:= Byte(c2 shr 8);
  g:= A * (v1 - v2) shr 8 + v2;
  v1:= Byte(c1 shr 16);
  v2:= Byte(c2 shr 16);
  b:= A * (v1 - v2) shr 8 + v2;
  Result := (b shl 16) + (g shl 8) + r;
end;

Threaded thumbnails demo

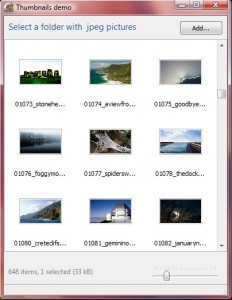
Yet another thumbnails demo, this time showing how to make the thumbnails in a seperate thread. There is a small problem which I belive is caused by the Delphi jpeg unit which sometime will render a thumbnail empty. With empty I mean that it has the correct width and height but not the image itself but just a white rectangle. If you figure out how to fix it please tell me so I can fix it. It only happens once and awhile so it is not easy to pinpoint what is causing it.

This demo also fix some problems which was present in previus thumbnail demos so if you had problems with previus demos try this one.

Using a diffrent imagelib seems to solve the problem reagarding blank thumbnail. I strongly recomend ImageEn but also GraphicsEx is a good one.

You need rkView installed to run this demo. You find it under components.

Download project with source

Added 01.dec.2009:
The same demo using ImageEnIO for loading and making the thumbs. You need to have ImageEn installed to compile and run this demo.

Download project with source (21 kB)
Download compiled demo (1008 kB)

rkView component

rkView v1.1 is done and ready for download. ParentFont support have been added and a problem with scrollbar calculation have been fixed. Please do report back if the problem is not solved.

What is rkView?
rkView is my solution for a listview/gridview. I do not like the included TListview that comes with Delphi so I made my own. That way I have full control of how it works and act.

The best way to see what you can do with rkView is to download any of the thumbnail demos. More demos will come later. If you make a demo using rkView I would love to see it, maybe it could be included as a demo?

Download rkView

Roy M Klever

A smarter button

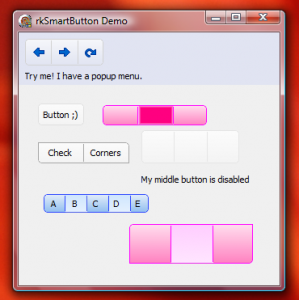
There is a lot of buttons out there I know but I have yet to find a button like this where you can have more than one button in “one button” (see screen shot). Especially at no cost.

RkSmartButton on display.

RkSmartButton on display.

I belive this is all you need to get started using rkSmartButton. I have tried to make it easy to use but there are a few things worth noticing… to show a popupmenu on any of the buttons you must set a flag in ButtonsPopup property which will look, something like this: 0010 “0” means do not show “1” means show. In this case only third button will get the popup. I also use this technic for enabling buttons and keeping hold of which one is down. No popup will be shown if CheckButtons is set. Popupmenu is shown after the button is pressed and hold down for the time given in PopupDelay property (like in Chrome). To get images on button add an imagelist and set the indexes in the ImageIndexes property. Use format like this: 0,1,2,7,4. To know which button was pressed use SelectedIndex property. Button number one gets the index of 0.

Thats it, hope you like it.

Next up is an update of SmartPathBar.

Download: Project with source

A smart pathbar component

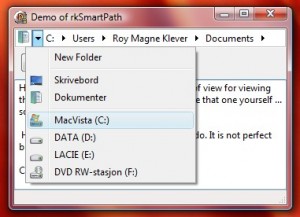
I finaly did it, made my smart pathbar component. It took a while to get it done but well here it is: rkSmartPath, I know, not a good name but I needed a name so …  It is quite easy to use, just give it a path, adjust some settings and you are ready to go.  Lets have a look:

ScreenShot of demo program

ScreenShot of demo program

The screenshot show the HomeMenu. Some default items are present like the drives and new folder items. The desktop and my documents items are optional. Making a new folder is as easy as clicking the new folder (name can be changed) writing name of the folder and you are done. Clicking outside the buttons will lett you paste a path or edit the one shown, you can cancel at any time by pressing escape key. You can also add favourites to the HomeMenu.

I guess thats it, quite easy isnt it. Please tell me what you think of it, I know it is not perfect but what is.

Download: Project with Source

Adjust brightness, contrast and saturation ++

Adjust image demo

Adjust image demo

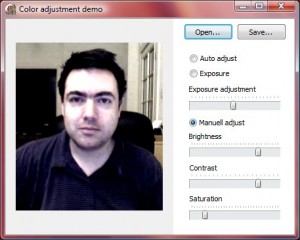
I have just uploaded a small demo of how to adjust brightness, contrast and saturation of an image. There are also two other usefull samples included in the demo. One is the auto adjustment setting (using histogram stretching) the other one is an exposure control, perfect for adjusting (lighten) dark pictures.

Hope you find it usefull and if you have some better ideas why not share em. These routines are based on a combination of my own and others ideas and source code.

Download: Project with Source

Cool thumbnails

An extra thumbnail post, the last one for a while.  I will show you how to edit caption of the thumbnail and how you can rate it using your mouse. The main activity is done in the CellHit event so make sure that CellSelect is set to false, somehow this must be done in code so a good place to do it is in formCreate event.
Rated thumbs

Rated thumbs

Here is the code for CellHit. One thing to remember about this event is that y is counted from the bottom and not from the top as normal. This can be a bit confusing.

procedure TfrmMain.viewMainCellHit(Sender: TObject; Canvas: TCanvas; Idx, x,
  y: Integer; var Selected: Boolean);
var
  i: Integer;
begin
  if (y < 20 ) then begin
    i:= 0;
    if (CellStyle = 0) and (y < 20) then i:= 1;
    if i <> CellEditIdx then begin
      CellEditIdx:= i;
      ViewMain.Invalidate;
    end;
  end else begin
    if CellEditIdx <> -1 then ViewMain.Invalidate;
    CellEditIdx:= -1;
  end;
  if CellStyle <> 1 then Exit;
  // Check if over rating stars
  if (x > HSX) and (x < HSX + 70) and (y < 20) then begin
    CellEditIdx:= 2;
    i:= 1 + (x - HSX) div 14;
    if i <> HotStars then begin
      HotStars:= i;
      ViewMain.Invalidate;
    end;
  end else begin
    if HotStars <> -1 then ViewMain.Invalidate;
    HotStars:= -1;
  end;
end;

This event code is called whenever mouse is over a cell to check if it is selected we use it to do some checking and set some flags which we use in the OnMouseDown event.

CellEditIdx is used to signal what to check for. If it is one we simply check if mouse is in the lower part of the thumb if it is we mark it and do a repaint. The same with rating we do a check to see if it is within the rating area and do a repaint if it changes value.

In the MouseDownEvent the action is done. If rating is active the selected thumb will be updated with the current rating. If rating is not active an editbox is activated giving you a chance to change the filename of the selected thumb. Note that in demo changing the name of the thumb will not change the real name of the file, it is just for showing you how to do it.

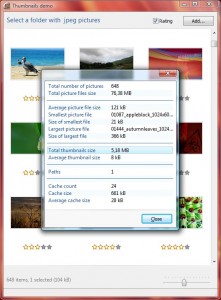
When tumbnail component got focus you can press F8 to see some statistic of current state.

Hope this helps a little. You should also update the rkView component used in this demo as some small bugs have been fixed. I will later publish rkview as a single post in its own with some more samples.

Next post up is how to adjust brightness, contrast and saturation to an image.

Download: Cool thumbnails
Showing thumbnails part #2

In part one I showed you how to show thumbnails in one predefined size, now it is time to take it to the next level. I show you how to make realtime resizable thumbnails.

Thumbs demo

Screenshot of thumbnails demo

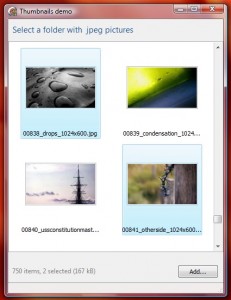
The trick to make it work is to use an additional  list of bitmap thumbnails. Thumbnails is still kept as jpegs in the items list. The diffrence between previus version and this one is that when rendred to screen they are converted to bitmaps and cached in a bitmap list. This makes screen update faster and more pleasent.

I use a cache size of one point five the screensize but you can set it to whatever you want.

rkView has been updated so it is recommended that you recompile the package where you installed the rkView.

Enough said download the code and see for yourself. Enjoy and have fun!

Download: Thumbnails demo

Showing thumbnails part #1

I have split the thumbnail project into to parts. In part one, this one,  I will show you how to view thumbnails the easy way using rkView.

rkView is just like a virtual grid view, no data is stored inside it.  rkView was made to ease the task of viewing tumbnails but are not in any way limited to this task.  I also use this component as a ownerdraw listview. So go ahead an install this component (it is included in the download).

Screenshot of Thumbs demo

Screenshot of thumbnails demo

Showing thumbnails using rkView is an easy task all we need is a list of thumbnails and some code to draw it. rkView will call the ‘OnCellPaint’ event for each cell, giving us a canvas to paint on.

In this demo I have chosen to store the thumbnails as jpeg since it occupies less space than using bitmaps.

Well it is time to download and run the code.

Download: Thumbnails demo