Tag Archives: Delphi

My curves tool

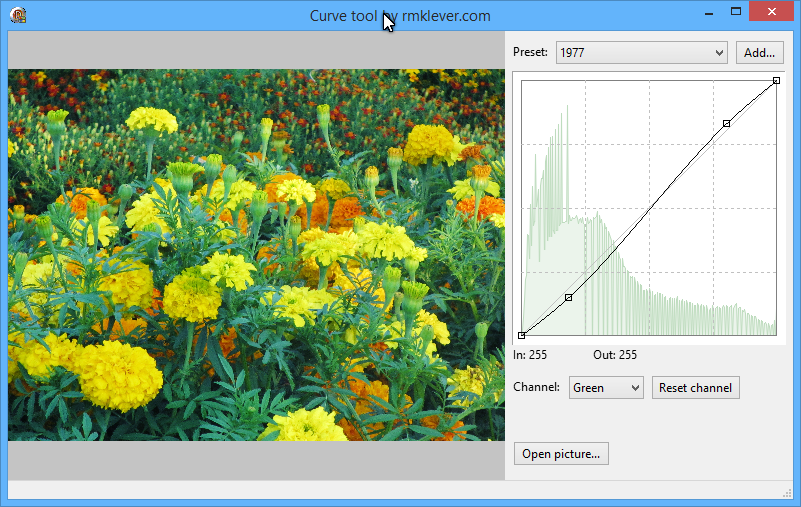
A image showing the Curves tool in action

Curves tool in action


This is my curves tool. Inspired by the curves tool in Photoshop and Gimp. It keeps a list of presets which is located in a folder “curves” in the application folder. All files in this folder is .ACV files which is standard Adobe curve files. When you add a curve to the preset it saves the curve to the “curves” folder.

This project was updated 02.04.2015. When clicking outside the grid, or at an horizontal value where it already exists a point, it would give an error. This has now been corrected.

Download project source and executable

Hope you find this tool useful.

This is just a demo and not a complete application I think of it as a curves preview dialog.

SmartPath v2.3 released

I am happy to announce that SmartPath v2.3 is here.

Whats new:
– Pressing arrow button now toggle popup menu.
– New event, OnError. Thanks Castor69.
– New property AutoComplete.
– Color properties for button painting have been added.
– Bug in keyboard navigating have been fixed.
– Bug in edit path have been fixed.
– Some small code optimization.

OnError AException values:
0 : Create directory failed

Download SmartPath2.3

Smooth vista gradient panel

VistaPanel image

Good looking vista panel

What is it? Simply a panel with a gradient that look like the gradient used in Vista. Play with the colors and I am sure you can come up with something you like. There really isn’t more to say about this small component.

Some times I just get the idea of trying to figure out how they make that gradient, well this is my take at the Vista gradient bar. Enjoy!

Download Component

Roy M Klever

Tabs with a twist – rkSmartTab

SmartTabs in use

SmartTabs in use

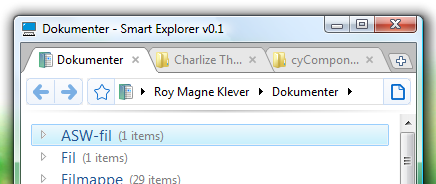
Here is a new component of mine, rkSmartTabs. Its a simple but easy to use tab bar component. It was made for my explorer application but I guess others might find it usefull too. I do not have a demo yet but you can download an early beta of my explorer to see and and get a feel for how it works. rkSmartTabs is rendered using GDI+ so you must make it available for Delphi. Hope you find it useful. Feedback is always welcome.

Download rkSmartTabs

Download BlaiseExplorer (540KB)

Tip: Use Ctrl left and right arrow to open/close all groups.

Mixing two colors

Just a quick tips for those of you needing to blend two colors. Usage is very easy.

// Usage  NewColor:= Blend(Color1, Color2, blending level 0 to 100);
function Blend(Color1, Color2: TColor; A: Byte): TColor;
var
  c1, c2: LongInt;
  r, g, b, v1, v2: byte;
begin
  A:= Round(2.55 * A);
  c1 := ColorToRGB(Color1);
  c2 := ColorToRGB(Color2);
  v1:= Byte(c1);
  v2:= Byte(c2);
  r:= A * (v1 - v2) shr 8 + v2;
  v1:= Byte(c1 shr 8);
  v2:= Byte(c2 shr 8);
  g:= A * (v1 - v2) shr 8 + v2;
  v1:= Byte(c1 shr 16);
  v2:= Byte(c2 shr 16);
  b:= A * (v1 - v2) shr 8 + v2;
  Result := (b shl 16) + (g shl 8) + r;
end;

rkView component

rkView v1.1 is done and ready for download. ParentFont support have been added and a problem with scrollbar calculation have been fixed. Please do report back if the problem is not solved.

What is rkView?
rkView is my solution for a listview/gridview. I do not like the included TListview that comes with Delphi so I made my own. That way I have full control of how it works and act.

The best way to see what you can do with rkView is to download any of the thumbnail demos. More demos will come later. If you make a demo using rkView I would love to see it, maybe it could be included as a demo?

Download rkView

Roy M Klever

A smarter button

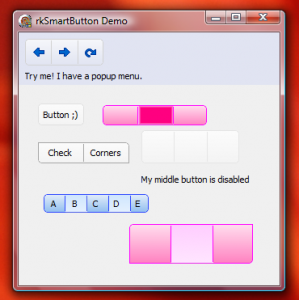
There is a lot of buttons out there I know but I have yet to find a button like this where you can have more than one button in “one button” (see screen shot). Especially at no cost.

RkSmartButton on display.

RkSmartButton on display.

I belive this is all you need to get started using rkSmartButton. I have tried to make it easy to use but there are a few things worth noticing… to show a popupmenu on any of the buttons you must set a flag in ButtonsPopup property which will look, something like this: 0010 “0” means do not show “1” means show. In this case only third button will get the popup. I also use this technic for enabling buttons and keeping hold of which one is down. No popup will be shown if CheckButtons is set. Popupmenu is shown after the button is pressed and hold down for the time given in PopupDelay property (like in Chrome). To get images on button add an imagelist and set the indexes in the ImageIndexes property. Use format like this: 0,1,2,7,4. To know which button was pressed use SelectedIndex property. Button number one gets the index of 0.

Thats it, hope you like it.

Next up is an update of SmartPathBar.

Download: Project with source

A smart pathbar component

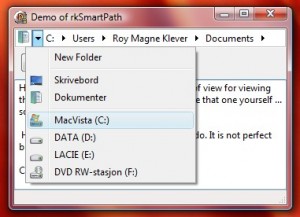
I finaly did it, made my smart pathbar component. It took a while to get it done but well here it is: rkSmartPath, I know, not a good name but I needed a name so …  It is quite easy to use, just give it a path, adjust some settings and you are ready to go.  Lets have a look:

ScreenShot of demo program

ScreenShot of demo program

The screenshot show the HomeMenu. Some default items are present like the drives and new folder items. The desktop and my documents items are optional. Making a new folder is as easy as clicking the new folder (name can be changed) writing name of the folder and you are done. Clicking outside the buttons will lett you paste a path or edit the one shown, you can cancel at any time by pressing escape key. You can also add favourites to the HomeMenu.

I guess thats it, quite easy isnt it. Please tell me what you think of it, I know it is not perfect but what is.

Download: Project with Source

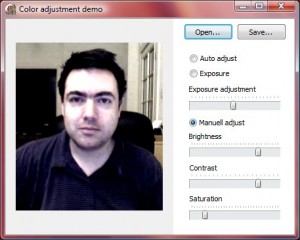
Adjust brightness, contrast and saturation ++

Adjust image demo

Adjust image demo

I have just uploaded a small demo of how to adjust brightness, contrast and saturation of an image. There are also two other usefull samples included in the demo. One is the auto adjustment setting (using histogram stretching) the other one is an exposure control, perfect for adjusting (lighten) dark pictures.

Hope you find it usefull and if you have some better ideas why not share em. These routines are based on a combination of my own and others ideas and source code.

Download: Project with Source

Cool thumbnails

An extra thumbnail post, the last one for a while.  I will show you how to edit caption of the thumbnail and how you can rate it using your mouse. The main activity is done in the CellHit event so make sure that CellSelect is set to false, somehow this must be done in code so a good place to do it is in formCreate event.
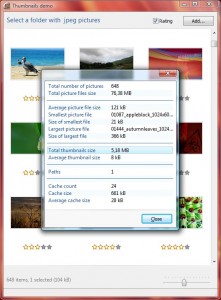
Rated thumbs

Rated thumbs

Here is the code for CellHit. One thing to remember about this event is that y is counted from the bottom and not from the top as normal. This can be a bit confusing.

procedure TfrmMain.viewMainCellHit(Sender: TObject; Canvas: TCanvas; Idx, x,
  y: Integer; var Selected: Boolean);
var
  i: Integer;
begin
  if (y < 20 ) then begin
    i:= 0;
    if (CellStyle = 0) and (y < 20) then i:= 1;
    if i <> CellEditIdx then begin
      CellEditIdx:= i;
      ViewMain.Invalidate;
    end;
  end else begin
    if CellEditIdx <> -1 then ViewMain.Invalidate;
    CellEditIdx:= -1;
  end;
  if CellStyle <> 1 then Exit;
  // Check if over rating stars
  if (x > HSX) and (x < HSX + 70) and (y < 20) then begin
    CellEditIdx:= 2;
    i:= 1 + (x - HSX) div 14;
    if i <> HotStars then begin
      HotStars:= i;
      ViewMain.Invalidate;
    end;
  end else begin
    if HotStars <> -1 then ViewMain.Invalidate;
    HotStars:= -1;
  end;
end;

This event code is called whenever mouse is over a cell to check if it is selected we use it to do some checking and set some flags which we use in the OnMouseDown event.

CellEditIdx is used to signal what to check for. If it is one we simply check if mouse is in the lower part of the thumb if it is we mark it and do a repaint. The same with rating we do a check to see if it is within the rating area and do a repaint if it changes value.

In the MouseDownEvent the action is done. If rating is active the selected thumb will be updated with the current rating. If rating is not active an editbox is activated giving you a chance to change the filename of the selected thumb. Note that in demo changing the name of the thumb will not change the real name of the file, it is just for showing you how to do it.

When tumbnail component got focus you can press F8 to see some statistic of current state.

Hope this helps a little. You should also update the rkView component used in this demo as some small bugs have been fixed. I will later publish rkview as a single post in its own with some more samples.

Next post up is how to adjust brightness, contrast and saturation to an image.

Download: Cool thumbnails